Virtual Audio Cable and Asio Link Pro are two software that help you transmit audio from Youtube to Cubase or Studio One to sing live. And today’s article I will show you how to setup on Virtual Audio Cable.
Virtual Audio Cable is a software product based on the WDM multimedia driver that allows users to stream audio files. flexibly and conveniently stream audio from one application to another.

I. Download Virtual Audio Cable
To download Virtual Audio Cable, click the Download button and wait for the timeout to appear a high-speed Google Drive link.
Note: If Drive doesn’t allow downloading, sign in to any Gmail account.
II. Install Virtual Audio Cable software
After downloading and unzipping, you get a folder with 2 parts as follows. Install ASIO4ALL first if your computer doesn’t have it (if you already have it, it’s okay to overwrite it).

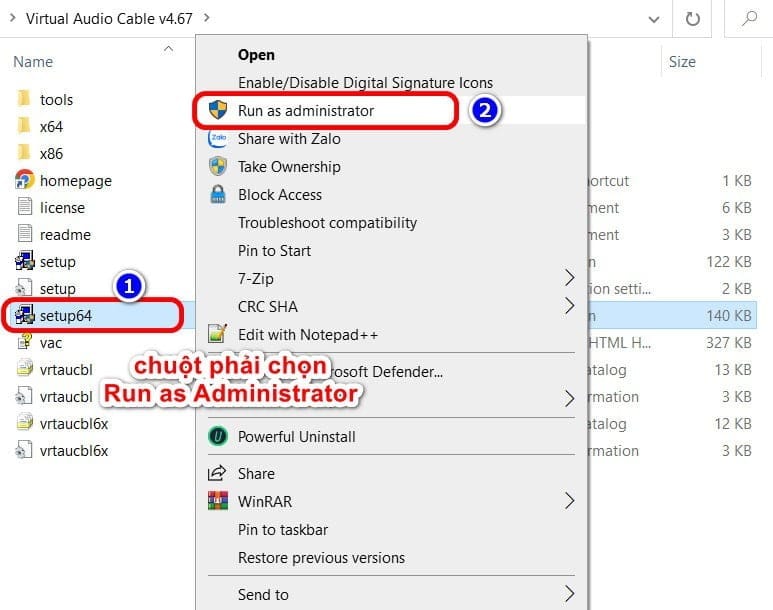
For Virtual Audio Cable, right-click Setup64 and select Run as administrator to start the application with admin rights.

Note: If you encounter an error during installation, please tick the box I am an advanced user, give me additional options is fine.
III. Line Setup for Virtual Audio Cable
After successful installation, go to Start, find the application VAC Control Panel with a blue icon, right-click and select Run as administrator.

After the Virtual Audio Cable interface appears, in the Driver section, enter the number 2 in the Cables section then press Set. Note to exit all software using use ASIO like Cubase, Studio One, Cakewalk… before doing it.

You access the Sound Control Panel by following the instructions as shown below

At the Playback tab, you Disable Line 2, at the Recording tab, Disable Line 1

IV. Setup IN OUT on software
After fully setup as instructed, go to Studio Setup of Cubase or Studio One, here I illustrate on Cubase 10 software. Note do not install Cubase 11 Artist version to setup with Virtual Cable.
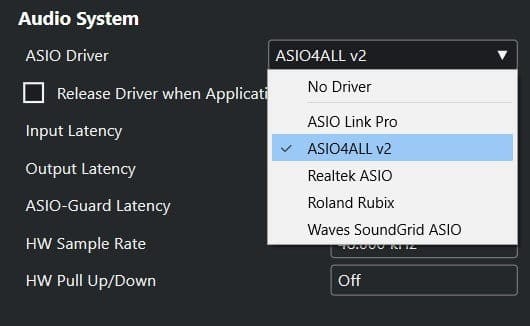
At ASIO Driver you choose ASIO4ALL v2

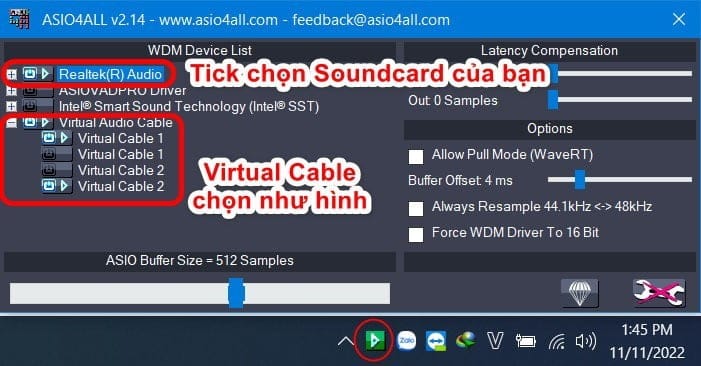
You open the ASIO4ALL interface and tick the box to select Virtual Audio Cable as shown with the name of the Soundcard you are using.

Then you go to Audio Connection and set up the BEAT music input at the INPUT section as Virtual Cable 1 1 and Virtual Cable 1 2.

Click the speaker icon in the system tray, select Line 1 (Virtual Audio Cable) to let the music from Youtube go to Virtual and enter the BEAT input on Cubase.

After you have Youtube music in the software, you need to set up more so that the Cubase exit goes to Line 2 of Virtual Audio.
On the Cubase software interface, press F4 or go to Studio -> Audio Connection.
Switch to Control Room (1) tab, open Control Room (2) and set Monitor 1 to Virtual Cable 2 1 and Virtual Cable 2 2.

V. Summary
When using Virtual Audio Cable in combination with ASIO4ALL, you will not be able to use the ASIO driver from your soundcard manufacturer. However, the possibilities of Virtual Cable are limitless and you can stream audio to whatever software you want.
I receive installation and setup of live singing software Cubase, Studio One, Cakewalk remotely via teamview, you can refer to the page “Service installation of live singing software“.