

There are now a lot of articles on how to separate hair and change the background in Photoshop with different ways such as Select and Mask or use Plug in support.
However, in the last few years it has not been supported on new versions of Photoshop and developers have not updated it, so it has been almost forgotten.
In addition to the above methods, today I will guide in detail how to separate hair with Panel Channel (color channel).
This method works best in the RGB color system. So the first thing to do is convert this image to RGB.
If you’re new to Photoshop, check out some of my newbie articles:
- Learn about Photoshop’s interface
- < a href=”https://ntblog.net/bar-cong-cu-tool-panel-photoshop/”>Overview of the Tool Panel in Photoshop
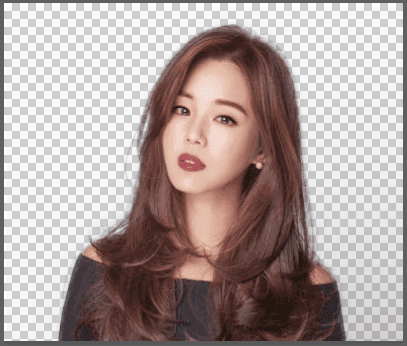
Note: You can only use this method when the background behind the subject is a single color and does not match the hair color. For example this image:

Convert image to RGB
After opening the image (Ctrl + O), go to the Image menu > Mode. If it’s in RGB color then you don’t need to do anything else.
Otherwise you choose RGB color if it is in another color system like CMYK or Indexed Color.
Some images you cannot edit when downloaded are because they are in Indexed Color, you switch to < strong>RGB or CMYK is fine.

Make a selection of objects in Chanel
What is a selection? Very simply, a selection is the part of the image that is currently selected so that when a tool is applied, it only affects that area.
Open the Channel panel, if you can’t find it, go to the Window menu and select Channel.
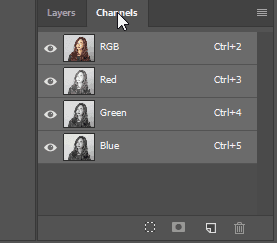
Click on each color channel, you see which color channel is the darkest, then drag it to the page icon below to copy it out.

Dùng công cụ Brush với màu đen và Hardness khoảng 40% vẽ lên layer vừa copy này.

After drawing, we get a black layer like this, then hold down the Ctrl key and click on the image box in the layer you just blacked out.

So that’s the step of creating a selection for the object, let’s move on to the next step.
Create a mask for the object
Click on the RGB Channel at the top, then return to the Layers panel (F7).
Hold down Alt and click the Add a Mask.
icon
The thumbnail next to the main layer is called a mask. In image masking, black represents loss of image, white represents visible.
The black part of the mask is the deleted part of the main image.

Thành quả đạt được:
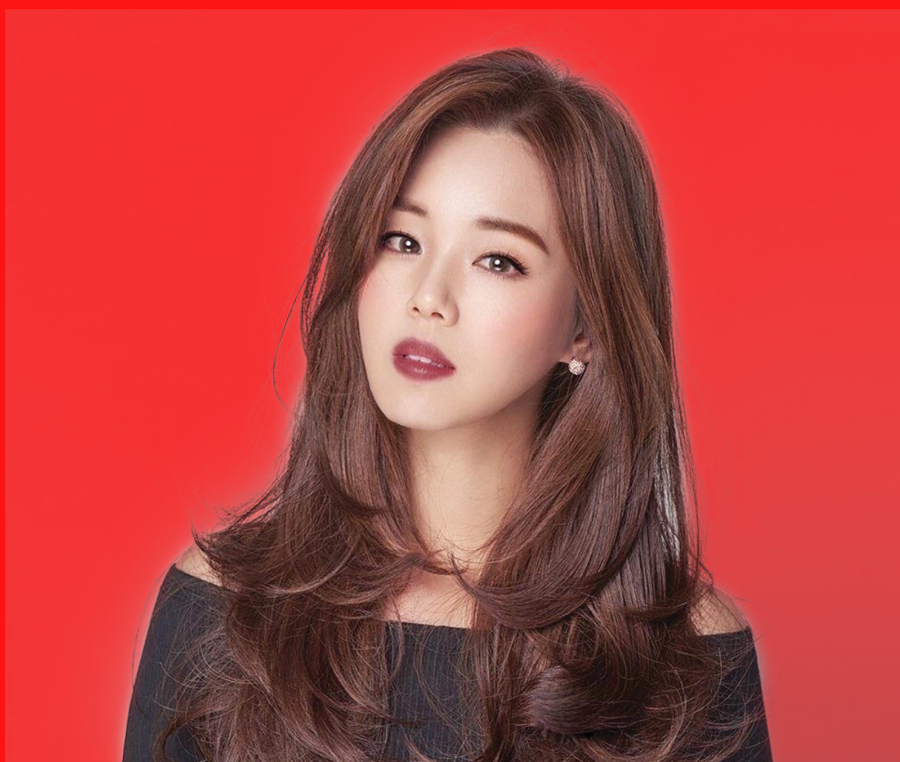
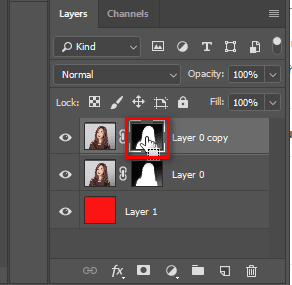
Click on the New Layer icon, then drag this layer below the girl layer and fill it with the Paint Bucket Tool (G) red.

At this point, all the defects in the girl’s hair will appear.
Select the mask of the girl layer, press Ctrl + L to open the Levels dialog box.
In the Input Levels section, drag the middle button to the right, the right button to the left, then give the girl’s hair the best results

To handle the white part around the girl’s hair, do the following:
Press Ctrl + J to duplicate the layer in the same window. Select the layer below and set the blend mode to Multiply.
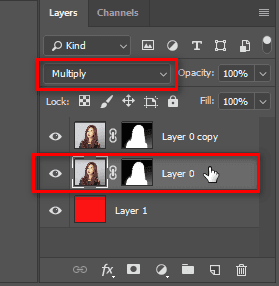
Chọn vào mặt nạ của layer ở trên
Use the Brush tool with the following settings:
- Color: black
- Hardness: 0%
- Opacity: 50%
Carefully draw on the white part of the girl’s hair, the white part will be erased.

Change the background (composite) for the object
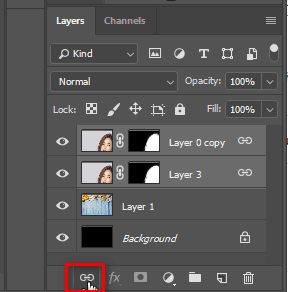
Find a nice and reasonable background image, open it in another window. Hold Ctrl and select both layers. Right click on the layer name, select Duplicate Layer.

In the Document section, choose the name of the background image you just opened.

Switch to the “background image” window, click on the layer link icon (chain) to lock these 2 layers together.
Use Ctrl + T to resize the image and move it appropriately.

End
End of the tutorial on how to separate sideburns and change the background in Photoshop here, it’s too easy, isn’t it.
It looks a bit long, but it only takes a few steps, and if you practice once or twice, you’ll remember it.
A little knowledge hope to help you in your journey self-study Photoshop.