After getting familiar with workspace
1. Create project file (Project)
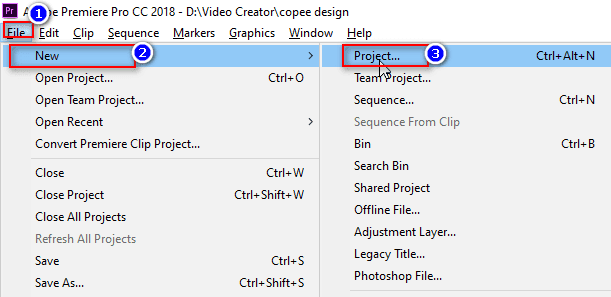
To insert the aforementioned objects into Premiere, you must first create project file (Project) by pressing nest Ctrl + Shift + N or select File > New > Project from the menu bar.
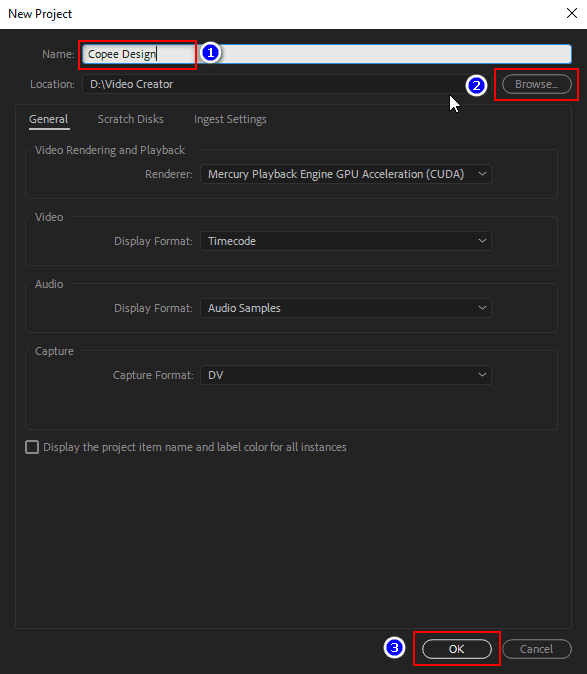
In the next dialog, enter the project name, where to save the file and click OK. You do not need to set anything else, video parameters such as size, format we will set up later.
2. Create Sequence (Video Profile Settings)
Before importing video into your project, you should configure Sequence first. So what is Sequence?
Sequence in Premiere is the term for a build – where all the movie editing takes place.
In a project we can create many different Sequences. The case to create a new Sequence is when starting a new Project or creating an additional Sequence for the existing Project.
Create a Sequence with the keyboard shortcut Ctrl + N or select File > New > Sequence from the menu bar.

A New Sequence panel will appear, you can choose one of the Presets available from the list, or set it manually in Tab Settings.

Name your Sequence and select OK to move on to the next step.
3. Import video, audio, images into Project
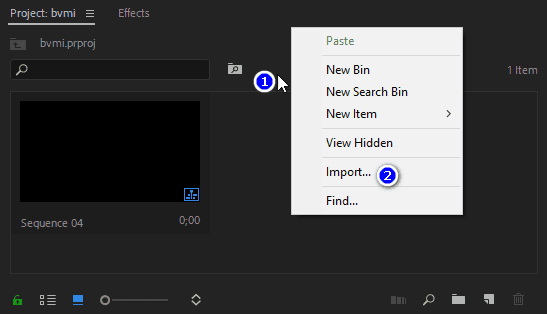
To import video, audio, images into Project, right click on Project panel (Project Panel) and select Import, then select the path to the object you want to import.
4. Import videos into Timeline Premiere
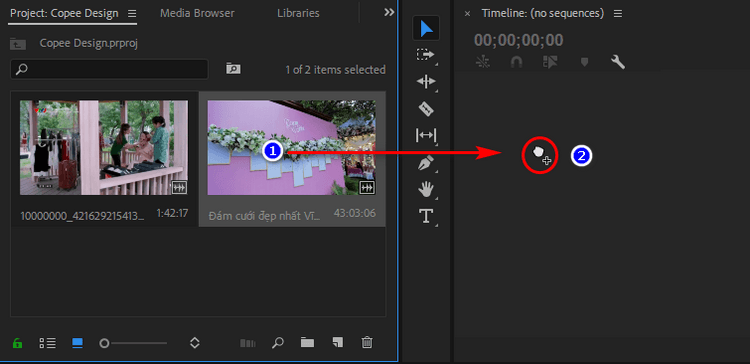
After importing the object into the panel, hold the mouse on the video, audio or image and drag it to the timeline panel to start processing such as cutting, merging, adding effects…
After dragging the Video to the Timeline, you may be asked about changing the settings if the Video you imported is different from the Sequence.
- Select Change Setting if you want to change the Sequence settings to the same as the Video input
- Select Keep Setting if you want to keep the original Sequence settings.
This is the timeline of Premiere Pro CC. The items I marked are:
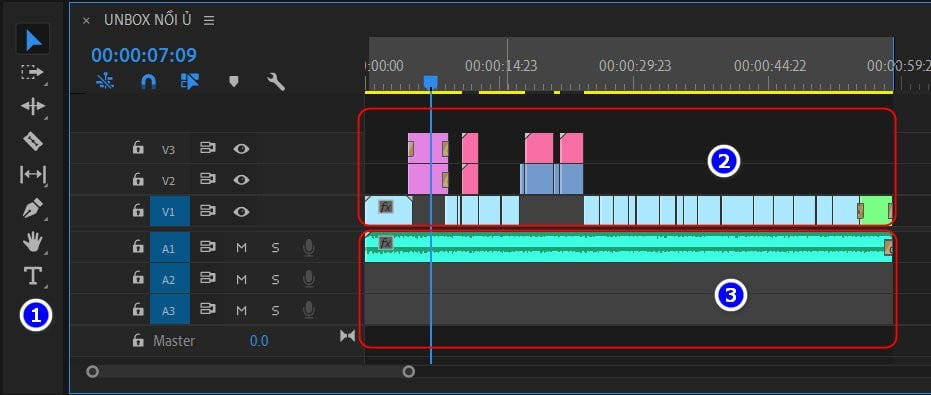
- Number 1 is the toolbar, check out Premie Pro CC Toolbar and commonly used panels if you don’t know anything about it.
- Number 2 is the timeline for the visual part of the imported Video.
- Number 3 is the audio timeline of the video input.
- No. Video input.
Bonus: To separate the image and sound separately, right-click on one of the two components and select Unlink

5. Ending
Pause the tutorial on how to import Premiere timeline video here, in the next article I will guide you to cut, merge and add Effect to the video.
You can follow future articles at Self-study Premiere of me. If you have any problems, please leave a comment below, I will reply as soon as possible.
Thank you for choosing Copee!