

How to create a drop shadow for an image in WordPress? What is the purpose of this?
A beautiful interface will make your readers stay on your site longer. In addition to good content, beautiful fonts, and eye-catching layouts, images are also quite important.
One way to decorate the image in your post is to cast a shadow on it. This will make the photo more soulful, especially the white background photos, which are placed on an interface with a white background.
Stop rambling, let’s get started!
Step 1: Define the CSS of the image
You should perform this step on Google Chrome. If you don’t have it, install it before going to the next step.
To determine the CSS of the images on your website, open any article, click the mouse. right on an image in that article and select Inspect

A panel like the following will appear on the right side of your web page.
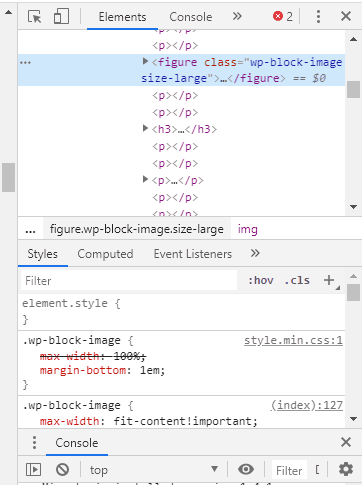
First in the Elements frame, you put your mouse on the line that is being high light and look at the image. If the image changes color or is highlighted, then go to the next step.

If you put the mouse on this line and the image still has no signal, then move your mouse to the upper line of the line that is high light and check again.
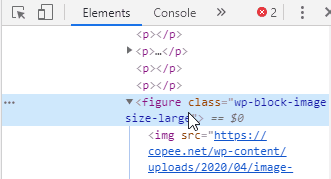
This is called the HTML line of the image, next we start defining its CSS.
In the Styles frame, you notice which attributes are related to the image such as img, image,…
Leave the mouse pointer on this line again, you will see the image on the post is highlighted or glowed.
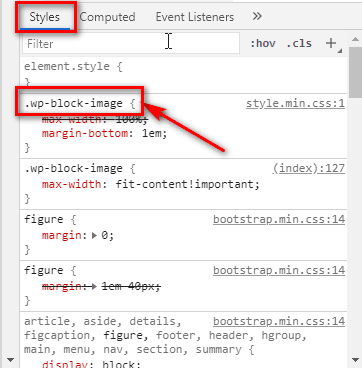
On my NT Blog web interface, the .wp-block-image attribute is the CSS of the image.
Depending on the type of interface, this CSS will have different names. You copy to somewhere and move on to the next step.
See more: Setting theme for WordPress website
Step 2: Insert CSS to create a shadow for the image
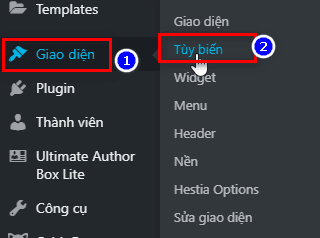
After logging in to the website administration, you access Interface > Customization
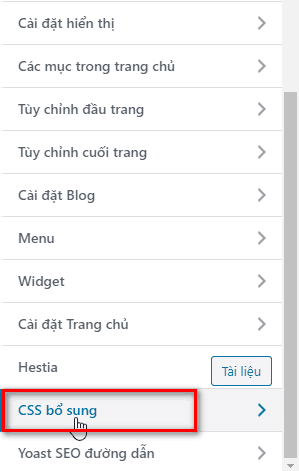
In the options bar on the left, scroll down to the bottom and you will see a setting named additional CSS.
Here, click and insert the copied CSS name as it bounces, adding brackets { at the end.
Note: There must be a space between the CSS name and the brackets.
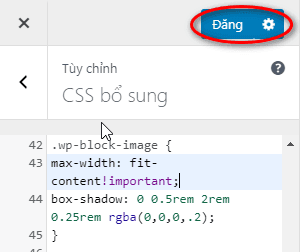
.wp-block-image {
You type Enter to enter a newline and insert the following lines:
max-width: fit-content!important;
box-shadow: 0 0.5rem 2rem 0.25rem rgba(0,0,0,.2);
}
After everything is done, press the Post button and open any post to check it again.
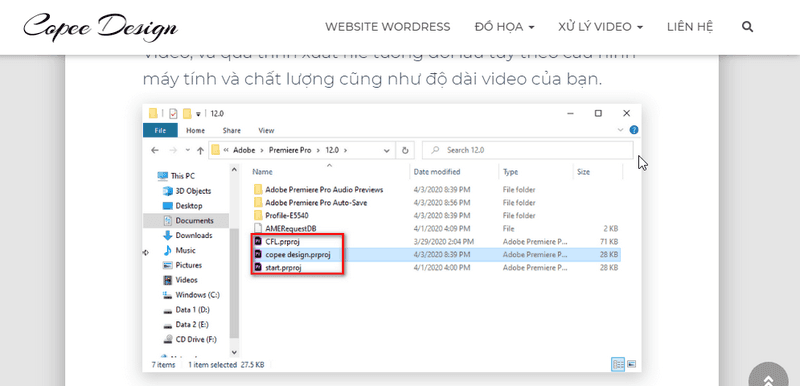
And here is the result:
Temporarily end the article Create Drop Shadow for images in WordPress here. If you can’t do it or have problems at any step, leave a comment below. I will help as soon as I can.
Good luck!