Recently, Presonus has released Studio One 6 for macbook and Windows with improved user interface combined with powerful customization features and faster startup. Information about the update can be found at software homepage.
Similar to Studio One 5 version, you must switch to Windows operating system to active permanently. For details on how to install Studio One 6, please continue reading this article.
I. Download and install Studio One 6 full active
Download Studio One 6 Full active for MacOS and Macbook at the following link:
MacOS
Windows
1. Install Studio One 6 for Macbook
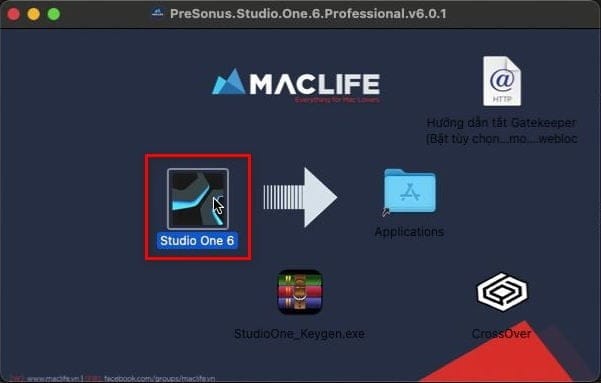
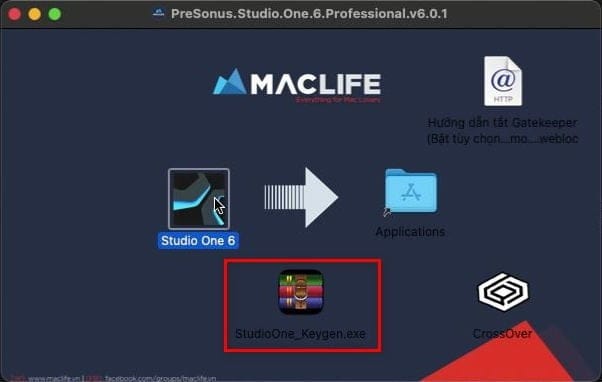
After downloading and running the installation file, you will open a folder like Studio One 6 and an active key generation software.
You drag the Studio One icon into the Applications folder as shown:
Open the terminal, paste all the following commands and press enter, enter the computer password (the password does not appear)
sudo -- sh -c "echo \ \ >> /etc/hosts";sudo -- sh -c "echo 127.0.0.1 registration.presonus.com >> /etc/hosts"

sudo -- sh -c "echo \ \ >> /etc/hosts";sudo -- sh -c "echo 127.0.0.1 api.presonus.com >> /etc/hosts"

sudo -- sh -c "echo \ \ >> /etc/hosts";sudo -- sh -c "echo 127.0.0.1 127.0.0.1 updates.presonus.com >> /etc/hosts"
Then run the Keygen file to create a key similar to the Windows instructions below.
2. Install Studio One 6 for Windows
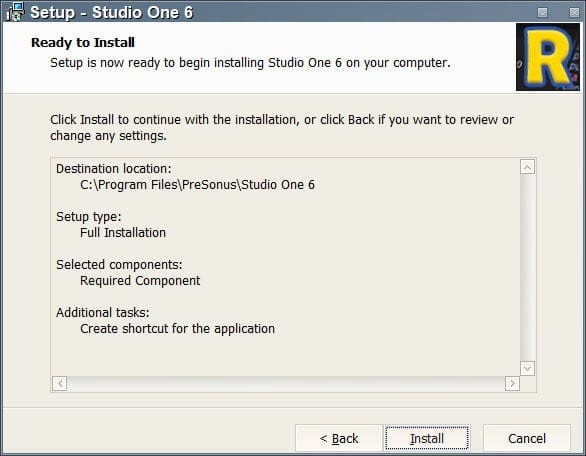
The installation is very simple, after downloading, click open and next until the software is installed.
3. Activate Studio One 6 for Macbook and Windows
Generating a software activation key for Windows or Macbook is completely the same. You need to open Studio One first to get the code. After running the application, you will see the following dialog, select I Accept

Login dialog box, you close it’s gone

At the window asking to activate the software, select Activate Offline!

The software will provide you with a code to activate, you copy and save somewhere to proceed to create an active key for the software.

To active Studio One 6, run Studio One Keygen.exe file in windows operating system.
Note that this active software has a virus, best you create 1 usb boot into winPE (virtual win) to create a key or the fastest is to bring it to an internet shop near home.
On Windows computers, you need to turn off your anti-virus program (if blocked) by going to Start type “Windows Security“, search for Virus and Threat Protection, select Manage Settings and turn off Real-time Protection.

Open the software Keygen on Windows, in the box Machine ID you manually enter code range copied from Studio One 6 on Macbook strong> and Press Generate.
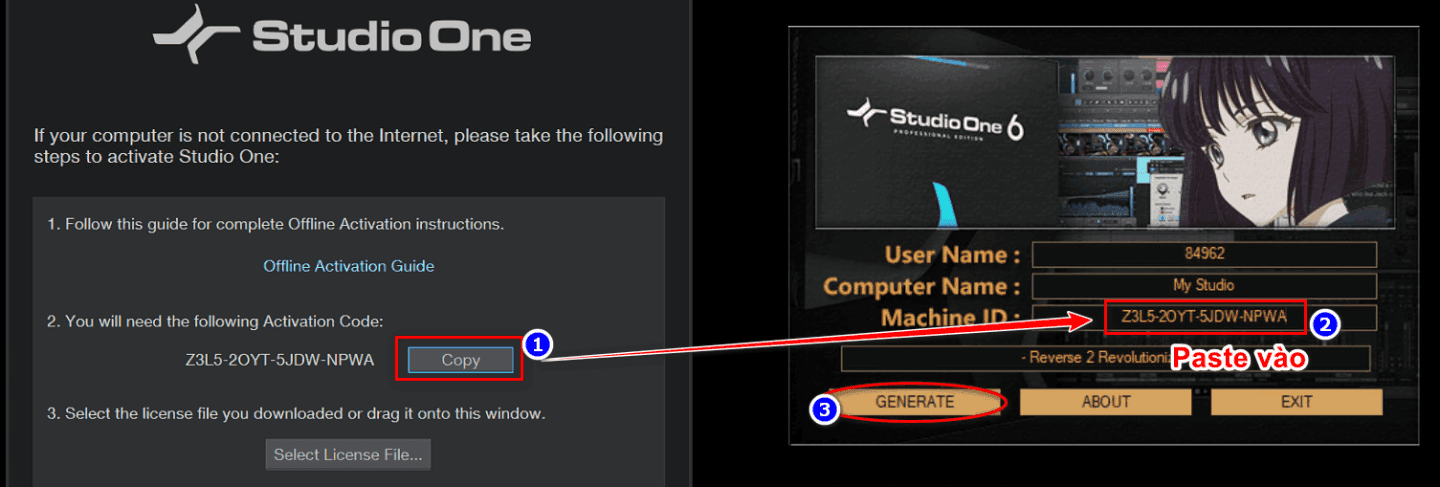
The software will ask you where to save the registration files, choose an arbitrary location and remember it. Here I choose Desktop.

The software will create a lot of license files in the selected folder, you delete them all, leaving only the studioapp6.pro file. You use this key to activate Studio One 6 on Windows.
If using a Macbook, copy the file studioapp6.pro to the USB and plug it back into the Macbook. Now go back to Studio One 6, click on Select License File and find the file studioapp6.pro on the USB.
If you receive a notification like this, congratulations, you have successfully activated it!

II. Conclusion
After successfully installing Studio One 6 for macbook, you need to install Wave suite, AutoTune Pro to be able to create project live singing on Macbook. These Plugins I will update later in the next articles and will update the link here!
Studio One 6 for macbook has a nicer interface, more professional features. However, if you just stop at the need to sing live and record normally, you can use the more compact Studio One 5 version.
If you don’t have time to learn, let me help you. Details can be found at service installation of live singing and recording software.